

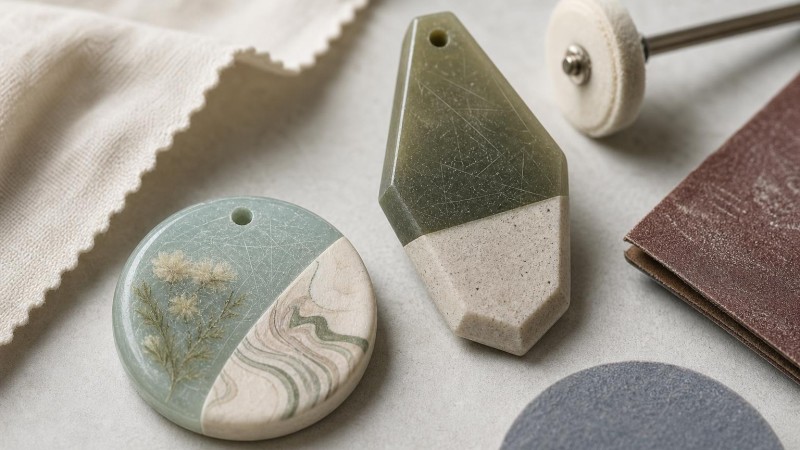
Why Scratches Happen on Resin and Polymer Clay Jewelry
Resin and polymer clay pendants are loved for their color, versatility, and lightweight feel, but they do scratch more easily than many natural gemstones or metal components. Everyday wear, storage in crowded jewelry boxes, contact with keys, and even dust particles on a work surface can leave fine marks behind. The good news is that many scratches are only surface-level and can be improved or removed with the right polishing method.
Understanding the material matters before you begin. Resin usually has a glossy, glass-like finish, but it is softer than stone and can become hazy if polished too aggressively. Polymer clay is durable after curing, yet its surface can also dull or pick up scuffs over time. Some pendants combine clay with embedded glitter, mica, pressed flowers, or accents like amethyst beads, which means you need a careful approach that restores shine without damaging decorative details.
If you have ever looked at a scratched pendant and assumed it was ruined, there is encouraging news: most pieces can be refreshed. The key is to match the repair technique to the depth of the scratch and the finish you want, whether that is a high gloss, satin sheen, or soft handmade look.
First, Identify the Type and Depth of the Damage
Before reaching for sandpaper or polish, examine the pendant under bright light. Hold it at different angles and look for whether the marks are light surface scuffs, moderate scratches you can feel with a fingernail, or deep gouges that may require sanding and recoating.
Light surface scuffs
These often appear as faint lines or a cloudy film. They are the easiest to correct and may only need a polishing compound or a micro-abrasive buffing step.
Moderate scratches
If the surface feels uneven but the damage does not go very deep, wet sanding followed by polishing is often the best solution.
Deep scratches or chips
These may need filling, reshaping, or a fresh topcoat of resin rather than simple buffing. On polymer clay, a deep scrape may require careful sanding and, in some cases, a thin compatible finish to restore an even appearance.
It also helps to identify whether your pendant has a coating. Some polymer clay pendants are left bare and buffed, while others are sealed with varnish or resin. A scratch in the topcoat may be easier to repair than a scratch that cuts into the clay itself.
Tools and Supplies You May Need
You do not need a professional studio to improve scratched pendants, but using the right supplies makes a major difference. Gather your materials before starting so you can work slowly and consistently.
- Soft microfiber cloths
- Mild soap and water
- Wet/dry sandpaper in fine grits such as 800, 1000, 1500, 2000, and higher
- Micro-mesh pads for extra-fine finishing
- Plastic polishing compound or resin-safe polish
- Cotton swabs for detailed areas
- A bowl of clean water for wet sanding
- Low-tack masking tape to protect metal parts
- A buffing tool or soft polishing pad, if used gently
If your pendant includes attached findings such as jump rings, chain bails, or glued embellishments, protect those parts before sanding. Metal can scratch the resin during handling, and water exposure may weaken certain adhesives if a piece was not originally made for immersion.
How to Clean the Pendant Before Polishing
Never polish over dirt, body oils, or dust. Tiny abrasive particles trapped on the surface can create more scratches while you work. Start by washing the pendant gently with lukewarm water and a small amount of mild soap. Use your fingertips or a very soft cloth, then rinse and dry completely with a lint-free towel.
Avoid harsh household cleaners, alcohol-heavy products, and rough scrubbing pads. These can cloud resin, strip certain finishes, or dull polymer clay surfaces. If the pendant has intricate textures, a soft brush with light pressure can help remove debris from crevices, but be cautious around glued decorations or delicate accents.
Once dry, inspect the surface again. Sometimes what looks like scratching is actually residue or minor haze, and a simple clean already improves the appearance.
The Best Method for Light Scratches
For fine hairline scratches and dullness, begin with the least aggressive option. Apply a small amount of plastic-safe polish to a microfiber cloth and buff the pendant using slow circular motions. Work in short sessions rather than pressing hard. Resin especially responds better to patience than force.
After buffing for a minute or two, wipe the surface clean and check the result under good light. Repeat if needed. On polymer clay, a gentle buffing step can restore a pleasing shine, especially on smooth, well-cured surfaces. If the piece has layered design details made with wire wrappers or metal-framed edges, polish carefully around those areas so the cloth does not snag.
Some makers use buffing wheels or rotary tools for speed, but this comes with risk. Too much friction can create heat, and heat can soften resin or alter the finish on polymer clay. If you use a machine buffer, choose a very low speed and keep the tool moving.
How to Wet Sand Moderate Scratches Safely
When polishing alone is not enough, wet sanding is usually the most reliable way to level the surface. This sounds intimidating, but if you use fine grits and stay patient, it can produce excellent results.
Step 1: Start with the least abrasive grit that can do the job
For moderate scratches, begin around 1000 or 1500 grit. If the scratch is more noticeable, you might start at 800 grit, but avoid going coarser unless absolutely necessary. Coarse grit removes material quickly and can flatten details.
Step 2: Keep everything wet
Dip the sandpaper in water and lightly sand the scratched area using small, even motions. Water helps reduce friction, washes away residue, and lowers the chance of deep new scratches. Do not soak pieces that may have water-sensitive glued elements.
Step 3: Sand evenly
Focus on the entire affected section rather than only the scratch line. This helps avoid creating a shallow dip. Check the surface often. Once the scratch is no longer visible, move to the next finer grit.
Step 4: Progress through finer grits
Continue with 1500, 2000, and finer polishing pads or micro-mesh. Each step removes the marks left by the previous one. Skipping grits often leaves a cloudy finish that is harder to polish out later.
Step 5: Polish and buff
After sanding, apply a polishing compound and buff the surface to restore clarity or shine. This final stage transforms the matte sanded look into a finished surface again.
This method works especially well for flat or gently curved pendants. For pieces with sculpted edges, beadwork, or inlays like freshwater pearls, use extra care around transitions where aggressive sanding could change the original shape.
Special Considerations for Resin Pendants
Resin can look dramatically better after polishing, but it also shows mistakes quickly. If the pendant is transparent or contains embedded botanical elements, glitter, foil, or pigment swirls, surface uniformity matters. Uneven sanding can create visible distortion in glossy areas.
For deep scratches on resin, some crafters prefer to sand lightly and then apply a fresh doming coat or thin sealing layer of compatible resin. This can restore a smooth high-gloss finish more easily than extended buffing. However, recoating requires a dust-free space, correct mixing ratios, and full cure time. If the original pendant already has dimensional decorative layers, test compatibility on a scrap piece first whenever possible.
Another important point: resin can yellow or soften if exposed to too much heat or direct sun during repair. Work indoors, avoid hot tools, and let polishing pressure stay light.
Special Considerations for Polymer Clay Pendants
Polymer clay gives artists wonderful freedom, from marbled effects to faux stone finishes inspired by materials like turquoise cabochons. Some styles are meant to stay matte, while others are polished to a high shine. Before repairing scratches, decide whether you want to restore the original finish or change it.
Uncoated polymer clay can often be wet sanded and buffed beautifully, especially if it was well cured. If the piece was sealed with varnish, sanding may remove that top layer unevenly. In that case, you may need to reapply a compatible finish after smoothing the scratch.
Be cautious with chemical polishes or solvents not specifically intended for plastic or clay-adjacent surfaces. Certain products can leave sticky residue or react with finishes. Gentle, tested methods are usually best.
Mistakes to Avoid When Polishing Jewelry Pendants
Using coarse sandpaper too soon: Starting too rough can create more work and remove fine details.
Dry sanding aggressively: This can build heat and leave deeper scratches.
Pressing too hard while buffing: Force does not equal better shine and may cause warping or haze.
Skipping grit levels: Visible sanding marks often remain if the progression is rushed.
Ignoring coatings: A sealed polymer clay pendant needs a different approach than bare clay.
Polishing around attachments carelessly: Findings, chains, and stone accents can scratch the surface while you handle the piece.
Slow, controlled work almost always gives better results than trying to fix everything in one pass.
How to Restore Shine After Sanding
Many people stop after the sanding stage and feel disappointed because the pendant looks dull. That dullness is normal. Sanding levels the surface, but shine returns during the finishing stage.
Use a dedicated plastic polish, resin polish, or ultra-fine buffing pad and work in thin layers. Wipe away residue between applications so you can actually see your progress. A soft polishing cloth is often enough for small pendants, while larger statement pieces may benefit from repeated hand-buffing sessions.
If the pendant originally had a mirror-like finish, do not expect instant results after one minute of polishing. Build shine gradually. In many cases, several short rounds produce a clearer, more even surface than one long, forceful session.
Can Toothpaste or DIY Home Remedies Work?
It is tempting to try popular internet shortcuts like toothpaste, baking soda pastes, or random metal polishes. While some of these may seem to improve minor haze, they are inconsistent and can introduce new micro-scratches or residue. Toothpaste formulas vary widely, and some are more abrasive than people expect.
For jewelry you care about, it is safer to use products designed for plastic, resin, or fine finishing. This is especially true for handmade pendants with layered designs, embedded inclusions, or mixed-media surfaces. A controlled method protects your time and the piece itself.
How to Prevent Future Scratches
Once your pendant looks refreshed, a few habits can help keep it that way. Resin and polymer clay jewelry benefit from thoughtful storage and gentle wear.
- Store pendants separately in soft pouches or lined compartments
- Keep them away from keys, coins, and harder jewelry pieces
- Wipe after wearing to remove oils and dust
- Avoid prolonged direct sunlight and excessive heat
- Put jewelry on last to reduce contact with sprays and cosmetics
- Transport handmade pieces in padded containers
If you create jewelry yourself, consider pairing polished pendants with smooth, quality components such as sterling clasps and well-finished bails to reduce friction points during wear.
When a Refinish Is Better Than a Polish
Sometimes the best repair is not polishing but refinishing. If a resin pendant has deep gouges, major surface clouding, or an uneven top layer, a new coat of resin may provide the cleanest result. If a polymer clay pendant has lost its finish across a broad area, sanding and applying a suitable sealant can create a more uniform look than trying to spot-repair individual marks.
This is also true for heavily textured or artistic surfaces where conventional polishing would blur intentional details. In those cases, preserving the design may matter more than chasing a flawless gloss.
Final Thoughts
Learning how to polish scratched resin and polymer clay pendants is a practical skill that can extend the beauty of handmade jewelry and treasured accessories. The most important steps are simple: identify the depth of the scratch, choose the gentlest effective method, work through fine abrasives patiently, and finish with proper polishing.
Whether you collect artisan pendants, make your own jewelry, or source creative supplies from PebbleBead, careful surface repair helps keep special pieces looking their best. Start slowly, test your method in an inconspicuous area when possible, and remember that a thoughtful restoration often brings a pendant back to life with far less effort than expected.

Leave a Comment