

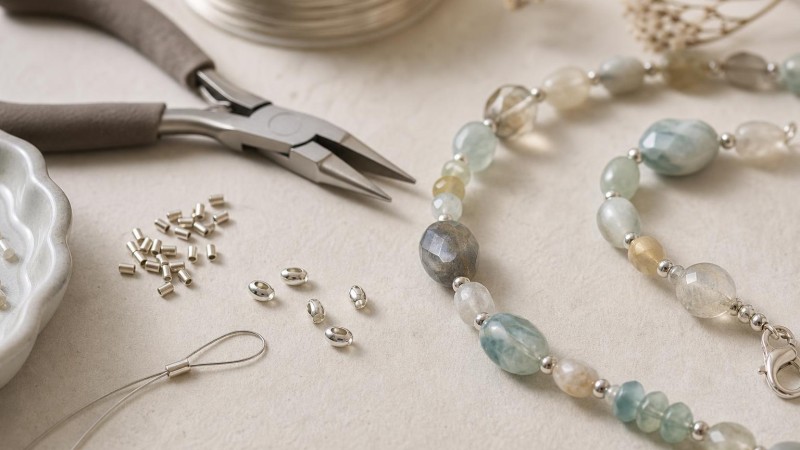
A beautifully strung necklace or bracelet can lose its polished appearance at the clasp if the finishing hardware looks bulky, uneven, or unfinished. Learning how to use crimp tubes and crimp covers correctly solves that problem while creating a secure connection between beading wire and clasp components. These tiny findings may be easy to overlook, but they perform one of the most important structural jobs in jewelry making.
Professional-looking crimps are not simply flattened pieces of metal. Good results depend on matching components, controlling wire tension, using the right tool, and forming the crimp in deliberate stages. This guide explains the complete process, including common mistakes, troubleshooting techniques, and practical habits that can make handmade jewelry cleaner and more durable.
What Are Crimp Tubes?
Crimp tubes are small metal cylinders used primarily to secure flexible beading wire. The wire passes through a crimp tube, through a clasp or connecting component, and then back through the tube. Compressing the tube grips the strands of wire and anchors the end of the jewelry.
Although crimp beads and crimp tubes serve similar purposes, tubes are often favored for precision finishing because their longer walls provide an even area for a crimping tool to shape. High-quality crimp tubes are available in several diameters and metal types, so the right choice depends on the dimensions and construction of your beading wire.
Crimps are especially useful for necklaces and bracelets made with flexible multi-strand wire. They are generally not substitutes for knots on thread or specialized ends used with leather, cord, or chain. Matching the finding to the stringing material is the first step toward a dependable finish.
What Are Crimp Covers?
A crimp cover is a C-shaped metal finding placed over a compressed crimp. When gently closed, it resembles a small round bead and hides the folded metal underneath. This gives the transition between the beaded section and clasp a smoother, more intentional appearance.
Unlike a crimp tube, a crimp cover is primarily decorative. It should not be expected to secure improperly crimped wire. The underlying connection must already be strong before the cover is installed.
Using crimp covers can also help coordinate finishing components with the rest of a design. Matching the cover to a clasp, chain, or other findings creates visual consistency, particularly when the hardware remains visible at the back or sides of a necklace.
Choosing the Correct Crimp Tube Size
One of the most common sources of crimp failure is mismatched sizing. A tube needs enough internal space to accept the beading wire twice, yet it should not be excessively large. A loose fit can make it difficult for the tool to compress the wire consistently.
Always consult the compatibility information supplied by the manufacturer of your beading wire and crimps. Flexible wire varies by diameter and by the number and arrangement of internal strands, so a combination that works for one wire may not be ideal for another.
As a practical check, thread the wire through the crimp and back through it before assembling the entire piece. Both sections should pass without force or obvious crowding. At the same time, the tube should not slide around the doubled wire with excessive empty space.
Tools and Materials You Will Need
Professional finishing does not require a large collection of equipment, but using components designed to work together makes a noticeable difference. Before beginning, prepare your chosen beads, flexible beading wire, clasp, crimps, covers, and suitable pliers.
- A crimping tool sized for your crimp tubes
- Chain-nose or crimp-cover pliers
- Flexible beading wire
- Correctly sized crimp tubes and covers
- A clasp and compatible connecting findings
- Flush cutters or appropriate wire cutters
- A ruler or bead board for checking finished length
Keep dedicated crimping pliers in good condition. The shaped jaws are engineered to fold and round crimps, while ordinary flat pliers generally produce only a flattened connection. Clean, undamaged tool surfaces also reduce scratching and unwanted marks on metal findings.
How to Crimp Beading Wire Step by Step
1. Thread the Crimp and Clasp
Slide a crimp tube onto the beading wire, then pass the wire through the loop on the clasp. Feed the wire tail back through the crimp tube. This creates a small loop connecting the wire to the clasp.
Whenever practical, pass the tail through the first few beads in the design. This neatly conceals the tail and adds stability near the closure. If you are working with delicate gemstone beads, make sure their holes comfortably accommodate the extra wire rather than forcing two strands through an opening that is too small.
2. Adjust the Loop and Tension
Move the crimp toward the clasp while leaving a small amount of movement in the wire loop. Avoid tightening it directly against the clasp. A little clearance allows the connection to articulate instead of bending sharply at a single point.
Before compressing anything, inspect the jewelry as a whole. The beads should sit naturally without large gaps, but they should not be packed so tightly that the strand becomes rigid. Flexible jewelry needs a small amount of play so that it can curve comfortably.
3. Make the First Crimp
Most standard crimping pliers have two working stations. The station nearer the handles typically creates the initial indentation. Place the crimp inside this shaped notch, checking that the two wire sections lie side by side rather than crossing inside the tube.
Squeeze the handles firmly and steadily. This first compression forms the tube into a crescent or folded shape with the wire strands separated into channels. Excessive force is unnecessary; the objective is controlled shaping, not crushing the metal as thin as possible.
4. Round the Crimp
Rotate the partially folded crimp approximately 90 degrees and place it in the rounded outer station of the pliers. Squeeze again. The jaws fold the two sides together, turning the crescent into a compact, rounded crimp.
Inspect the result from several angles. The crimp should be neat and firmly closed, without sharp projections. Give the wire and clasp a controlled tug to verify the connection before hiding it beneath a cover.
5. Trim or Conceal the Wire Tail
If the tail has been threaded through adjacent beads, trim only the excess emerging farther along the strand. Do not cut so closely to the crimp that the cutter can nick the main wire. A damaged strand near the clasp can substantially shorten the working life of the piece.
How to Install a Crimp Cover
Once the crimp has passed your security check, position an open crimp cover around it. The crimp should sit fully inside the cavity rather than resting against the opening. Choose a cover large enough to contain the folded tube without requiring excessive pressure.
Use chain-nose pliers with smooth jaws or purpose-made crimp-cover pliers to close it gradually. A quality pair of chain nose pliers provides useful control, but avoid serrated jaws that may leave impressions on a polished surface.
Apply a small amount of pressure, check alignment, rotate the cover if necessary, and continue until the opening closes into a nearly round bead. Trying to close the cover in a single hard squeeze often creates an oval, a visible seam, or overlapping edges.
Why Professional Crimps Sometimes Fail
Even an attractive crimp can be structurally poor, so diagnosing failures requires looking beneath the cover. Several problems occur repeatedly in stringing projects.
- Using the wrong crimp size: A tube that is too small can overcrowd or damage the wire, while an oversized tube may not grip it correctly.
- Crossing the wire inside the tube: Wire sections should generally lie parallel during the initial compression so the tool can form distinct channels.
- Crushing instead of crimping: Simply flattening a tube with ordinary pliers may create sharp stress points and an inconsistent grip.
- Overtightening the strand: Beads packed without enough movement can put continual stress on the wire near the clasp.
- Reusing a crimp: Once a tube has been compressed, reshaping and recrimping it can fatigue the metal. Replace it instead.
- Using the cover as reinforcement: A decorative cover cannot repair an insecure crimp underneath it.
Getting the Tension Right
Tension is one of the less obvious differences between beginner and polished stringing. If too much wire remains visible near the clasp, the design may appear unfinished. If the beads are squeezed together too tightly, the necklace or bracelet may kink instead of draping naturally.
A useful technique is to arrange the complete strand before finishing the second end. Hold the piece in its intended curved shape rather than pulling it into a perfectly straight line. Gently move the final beads toward the clasp and remove obvious gaps while preserving enough flexibility for them to shift slightly.
This becomes particularly important with irregular materials such as freshwater pearls, whose shapes may not sit in perfectly uniform rows. Allowing natural spacing can create better drape than forcing every bead into rigid contact.
Working With Different Bead Weights
Component choice should reflect the entire piece, not merely the appearance of the clasp. A lightweight strand of small beads imposes different demands on wire and crimps than a long necklace made from substantial stone beads.
For heavier designs, start by selecting appropriately rated beading wire, then choose compatible crimps recommended for it. Adding a larger crimp to thin wire does not automatically make the connection stronger. System compatibility matters more than the visual size of any individual component.
When working with substantial agate beads, for example, examine the finished strand for excessive weight and leverage at the clasp. A well-made termination can still experience unnecessary strain if the underlying stringing material is unsuitable for the design.
Creating a Cleaner Clasp Area
The last few centimeters of a necklace deserve as much planning as the central decorative section. Keep metal finishes consistent when possible, orient clasp components neatly, and make sure decorative covers do not interfere with moving parts.
You can also use a wire-protection finding where flexible wire passes around a clasp loop. These small channels help guide the wire through a smooth curve and can create an especially refined termination. If your design incorporates wire guardians, confirm that their channels fit the selected beading wire and that the clasp loop has enough room for the assembly.
Symmetry is useful, but it is not an absolute rule. Some clasp systems require different components on opposite ends. What matters is that each side looks intentional and operates freely without pinching the strand.
Practice Before Finishing Valuable Materials
Crimping is a small mechanical skill, and a few practice connections can be more useful than repeatedly correcting a finished necklace. Cut short pieces of spare beading wire and practice forming crimps until you can recognize the correct crescent after the first compression and the compact shape after the second.
Test those samples by pulling firmly on the connection. If the wire repeatedly slips, check sizing and technique rather than simply squeezing harder. If the wire breaks directly beside the crimp, inspect the folded tube and your tool placement for sharp edges or excessive compression.
Practice also makes it easier to install covers without marking them. Once you know how much pressure your pliers require, closing a tiny cover becomes controlled rather than tentative.
Professional Finishing Tips
Consistency is often more noticeable than complexity. Use the same crimp method at both ends of the strand, inspect the closure under good lighting, and remove any component that becomes visibly distorted during assembly. Findings are small, but imperfections near a clasp can attract attention because several functional components meet in one compact area.
Keep replacement jewelry findings close to your work area so you are not tempted to reuse damaged crimps or covers. It is generally better to replace a compromised component immediately than to build the rest of a piece around an uncertain connection.
Finally, test finished jewelry before considering it complete. Open and close the clasp several times, flex the strand, inspect both terminations, and gently tug each connection. The beads should move naturally, the wire should show no obvious kinks, and the crimp covers should remain closed without restricting the clasp.
Frequently Asked Questions About Crimp Tubes and Covers
Can I use regular pliers instead of crimping pliers?
Regular pliers can flatten certain crimps, but dedicated crimping pliers create the characteristic two-stage fold that helps produce a compact, controlled connection. For repeatable professional-style results, the purpose-made tool is usually preferable.
Do I always need a crimp cover?
No. A correctly formed crimp can function without a cover. Crimp covers are finishing components used when you want to conceal the compressed tube and create the appearance of a small metal bead.
Can I reopen a crimp cover?
Sometimes a cover can be opened carefully, but metal can become scratched, distorted, or weakened during manipulation. If its shape or finish has been compromised, replacing it is generally the cleaner option.
How close should the crimp be to the clasp?
Close enough to look tidy, but not so close that the wire is pulled rigidly against the clasp loop. Leave enough room for the clasp connection to move naturally without creating a pronounced bend in the beading wire.
A Small Finding That Makes a Major Difference
Crimp tubes and covers illustrate an important principle of jewelry making: professional results often come from careful handling of the least conspicuous components. Correct sizing, parallel wire placement, two-stage crimping, thoughtful tension, and gradual installation of the cover all contribute to a secure and polished finish.
Once these habits become routine, finishing strung jewelry becomes faster and more predictable. Whether you are combining natural stone beads with simple metal accents or creating an intricate necklace with many components, taking a few extra moments at the clasp can make the entire design feel more deliberate, refined, and complete.

Leave a Comment